Managing ads for 10 products is already complex. But when your catalog grows to 50, 100, or even 200 SKUs, everything starts to become hard to control: data is scattered, budgets are spread thin, and it’s difficult to know which SKUs are really worth investing in.
If you’re in that situation, keep reading because this article will help you build a controllable campaign structure, and more importantly, a scalable one. We’ll go from the preparation phase, on how to build campaigns at launch, to the framework for optimization and scaling. Let’s get started.
Understanding the Complexity of Managing 10-200 SKUs
When your product catalog is small, you can group everything into a few campaigns and still track performance. But when the number increases to 30, 50, or 200 SKUs, you face three common problems:
- Noisy data: Products crowding the same campaign make it hard to know which SKUs are truly strong. You look at total ROAS and it seems good, but in reality, most of the budget often ends up concentrated on just a small portion of the products.
- Cannibalization: SKU A triggers keywords for SKU B, or vice versa. Result: you don’t know which ad is causing conversions.
- Hard-to-control budgets: Without clear grouping → money goes randomly to products → good products lack budget.
If this feels familiar, then campaign structure is what you need. With the right structure, you don’t have to “guess” which SKU works; the data will tell you.
Pre-Launch Preparation
Before hitting the launch button, spend time cleaning your product data. Titles must accurately describe the product, images should be clear enough for someone to decide in 1-2 seconds, descriptions should match search intent, and displayed prices must be consistent. If your feed or listing is messy, all future optimizations are limited.
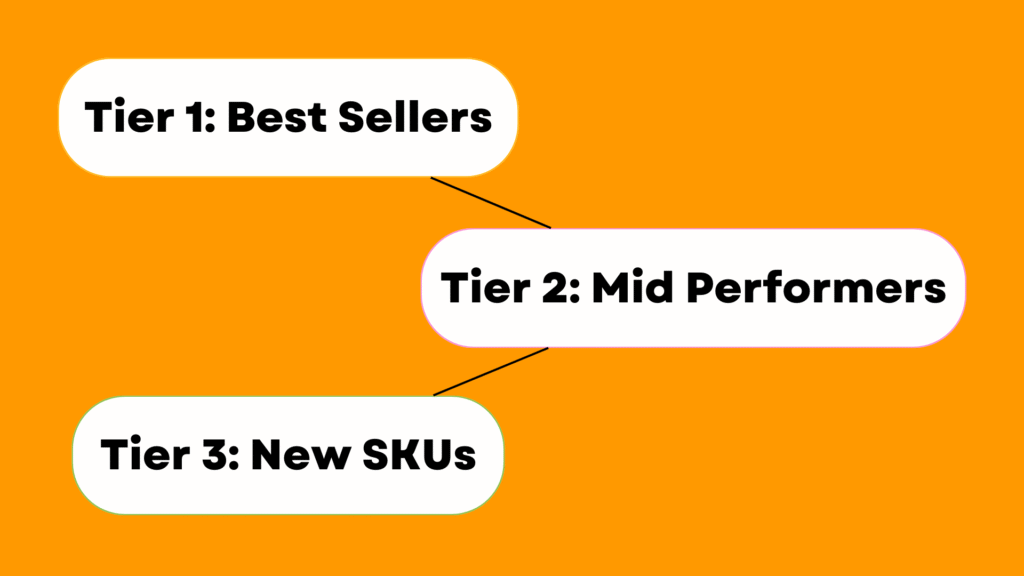
Classify products into three groups:
- Best Sellers: Products with stable revenue
- Mid Performers: Products with potential but not yet outstanding
- New SKUs: Products without data need testing
This classification is not fixed; you can adjust based on actual sales in the first 30–60 days. But starting with three groups helps you define budget targets and KPIs for each group.
Regarding keyword and audience research: group keywords by intent (buy now, compare, research) rather than just by category.
For audiences, start with core audiences (people who have interacted or purchased) and expand with lookalike once enough data is available.
Also, set clear KPIs for each group. Best-sellers can accept lower CPA, higher ROAS; new SKUs can temporarily accept higher CPA because the goal is to collect data.
Launch-Phase Campaign Structure
At the launch phase, the main goal is to collect clean data and avoid waste. I recommend structuring by tier, each tier having its own goals and rules.
Tier 1: Best Sellers
These SKUs have proven themselves in the market. Separate them into their own campaigns, prioritize budget, and use bidding strategies to maintain a high position at acceptable costs. Here, you should use smart bidding if there is enough data (conversion history) or manual capping if you want tight control.
Tier 2: Mid Performers
These SKUs show promise but are not stable yet. Assign a moderate budget, run testing campaigns to see if they can be promoted to Tier 1. In Tier 2, prioritize A/B testing creatives and landing pages rather than increasing the budget.
Tier 3: New SKUs
The goal is simple: collect data. Do not use a large budget. Run multiple formats (search, shopping, Performance Max on Google; Sponsored Products + Sponsored Brands on Amazon) to see which channel performs best quickly. If a SKU after 2-4 weeks has a conversion rate and CPA within the threshold, move it up to Tier 2.
For ad group/ad set structure, don’t group too many SKUs into a single ad group. An effective ad group has a unified intent and matching creative. On Google, separate match types: exact for conversion intent, broad for discovery. On Meta, separate by audience intent and behavior.
For initial budget allocation, a simplified reference framework: prioritize 60-70% for Tier 1, 20-30% for Tier 2, 10% for Tier 3. Ratios vary by industry; the key is to have clear criteria for adjustments.
Scaling and Optimization Framework
1. Conditions to Scale
Campaigns must be stable with adequate data before they are increased. The ROAS or CPA must be stable enough to meet KPIs, with day-to-day fluctuations not significant. Also, the campaign must have come out of the learning phase to enable the algorithm distribution to take place efficiently. Monitor performance for at least 7 days to ensure that the present trend is not temporary. Under such conditions, scaling is not too risky, and traffic distribution quality is ensured.
Important Indications of Stability:
- Consistent KPI performance: the difference in ROAS/CPA is small.
- Exit learning phase: Algorithm has maximized delivery.
- Trend confirmation: A week of performance does not exhibit any shocking upward or downward movements.
2. Scaling Strategy
When campaigns pass through the stability test, then scale slowly. Add 10–20 percent more budget every cycle, typically in 3–5 days, and this enables the algorithm to smooth without reestablishing history.
Single-SKU Campaigns of Top Performers
Consider designing single-SKU campaigns in SKUs that demonstrate outstanding performance. This will aid in regulating budget allocation and prevent top-performing products from cannibalizing each other’s keywords.
One Change at a Time
In scaling, never change more than one variable. As an example, when you increase the budget, do not change bids at the same time. This strategy will enable you to make a clear assessment of the effect of every change and keep performance results under control.
3. Waste Reduction and Cost Control
Cost control during scaling prevents budget wastage and inefficiency.
Elimination of Underperforming SKUs
After SKUs have had sufficient time to collect data, pause or eliminate the underperformers. This releases funds to more potential products and enhances the general effectiveness of the campaign.
Utilizing Negative Keywords / ASINs
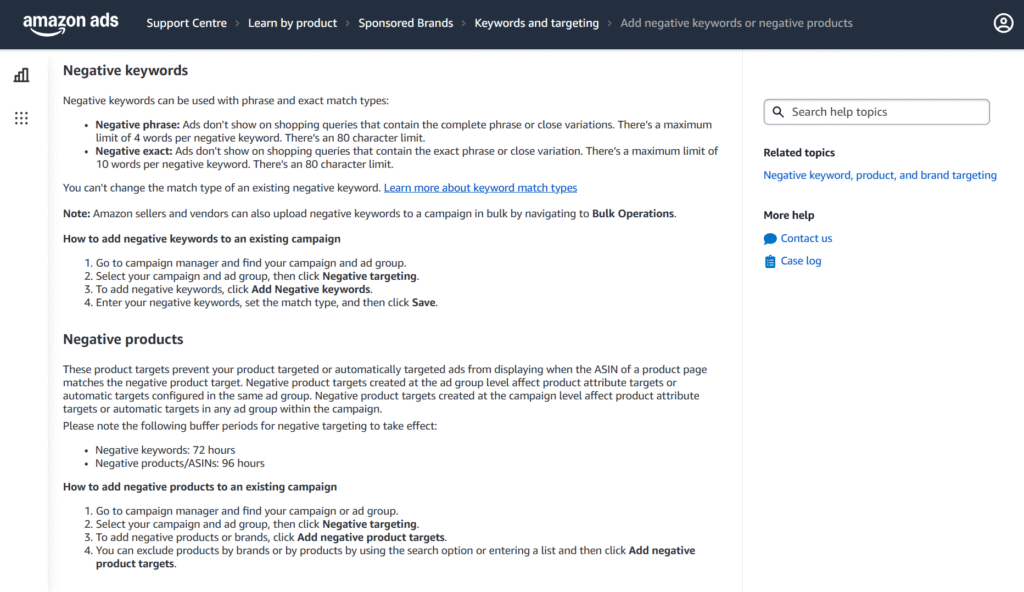
Source: Amazon
Use negative keywords or negative ASINs to minimize exposure to low-quality traffic. This will avoid wasting your budget on searches or placements likely to be unsuccessful.
Intent-Based Bid Adjustments
The adjustment of bids should be on the basis of search intent and not a reduction across the board. This enables the high-converting queries to take precedence and reduces spend on low-intent searches.
4. Expansion Strategy
It is possible to increase outreach to win new traffic and audiences as soon as campaigns have grown consistently.
Keyword Expansion
Introduce new keywords one at a time, starting with broad match to get data. In the future, narrow down to a phrase or exact match with search term reports to enhance relevancy and efficiency in conversion.
Audience Expansion
Exploit similar audiences using your current customers to attract new potential customers, and the relevance remains high.
New Formats & Channels
Try other ad formats like video ads, Performance Max or shopping ads. The increased formats will increase the number of distribution channels and reduce reliance on a single traffic source.
5. Automation Framework
Automation saves time on manual labor and enhances the degree of uniformity when implemented tactically.
Smart Bidding for Tier 1
In case of Tier 1 SKUs with high conversion rates, Smart Bidding is optimized with respect to delivery and ROI.
Tier 2 and Tier 3 Rule-Based Automation
In both Tier 2 and Tier 3 SKUs, automate with rule-based adjustment of bids, pause poorly performing keywords, and cost control without requiring constant manual oversight.
Checklist and Weekly Monitoring
Have a checklist weekly to monitor:
- Increasing performance SKUs
- SKUs showing decline
- Budget allocated in favor of non-performing SKUs
Automation requires regular human intervention to ensure that timely actions are taken to maintain the overall health of the campaign.
Reporting
You need a dashboard that answers three quick questions: (1) where money is running, (2) SKU-level performance, (3) next action steps. Reporting by tier shows the overall picture without being overwhelmed by details.
- Tier 1: watch ROAS and CPA
- Tier 2: track promotion rate of SKUs
- Tier 3: focus on impressions, CPC, and learning data
Set daily reports as snapshots, weekly reports for decisions (promote/demote/pause), and monthly reports for structural adjustments. The goal: fewer gut decisions, more rule-based decisions.
Conclusion
Advertising for 10-200 SKUs is always challenging. But when you have a clear campaign structure, tiered campaigns separated by specific goals, and a proper scaling framework, everything becomes much more controllable.
The most important point: you don’t need to optimize based on feelings. Data will tell you which SKUs need more budget, which should be reduced, and which strategies are effective.
If you want to build a long-term, stable ad system, start by redesigning your campaign structure. Once the foundation is solid, scaling will come naturally.
FAQs
1. When should a SKU move from Tier 2 to Tier 1?
Promote a SKU when it consistently meets or exceeds your ROAS/CPA KPIs for at least 7-14 days, shows stable conversion volume, and maintains performance even with small budget increases. If results stay strong after a 10–20% scaling cycle, it qualifies for Tier 1.
2. What should I do if many SKUs in Tier 3 get clicks but no conversions?
First, review search terms and add negative keywords to eliminate irrelevant traffic. Second, check product pages for alignment with search intent. If performance doesn’t improve after 2–4 weeks, pause the SKU to avoid further waste and reallocate the budget to better-performing products.
3. Should I run single-SKU campaigns for all products once they perform well?
No. Single-SKU campaigns should be reserved for top performers who consistently drive conversions and scale well. Using them for every SKU will complicate management and dilute budgets. Only Tier 1 or potential Tier 1 products benefit from this structure.